Share this
The first step towards obtaining high-quality and abundant crops in plant production is soil analysis. Through soil analysis, important information is obtained about the nutrient content of the soil, the type and amount of fertilizer to be applied, and the identification of the sources of nutritional deficiencies in the soil. In addition, factors such as soil depth, texture, and groundwater level (drainage) can also be clarified.
The benefits expected from soil analysis depend primarily on whether the soil samples are taken correctly and according to the rules. When looking at agricultural soils from the outside, the soil may seem uniform everywhere, but this appearance can be misleading.
Taking Soil Samples
Where to take soil samples in the field:
The nutrient content of agricultural soils varies according to many factors such as soil formation, the types of plants grown, the fertilization programs applied, climate, irrigation frequency, and amount. Therefore, separate soil samples should be taken from each field. Moreover, different parts of the same field may have varying characteristics. For example, one part of the field may be light-colored, while another part may be dark. This color difference indicates that the two parts of the field differ in terms of organic matter, iron, and other substances. Some parts of the field may be flat, while others may be sloped, or there may be sections with varying yields. If there are such distinct areas within the same field, separate soil samples should be taken from these areas as well.
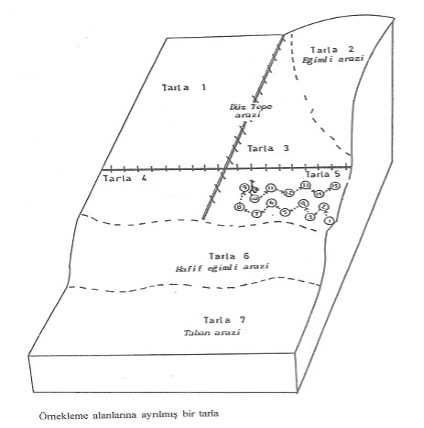
Where not to take soil samples:
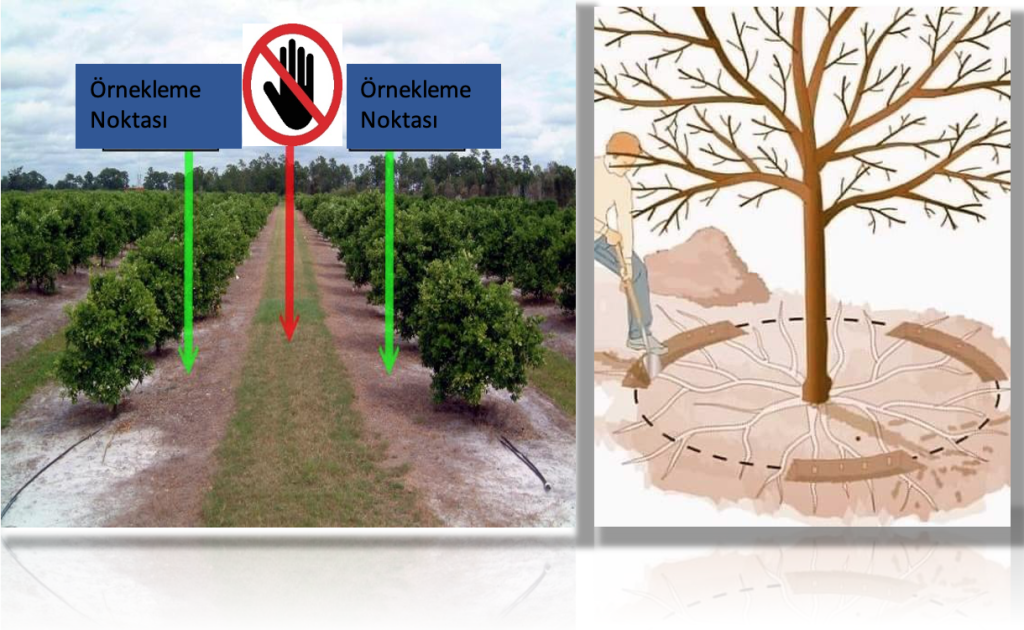
Once the area for soil sampling is determined, the location where the shovel is placed should not be in places like threshing floors, areas where animals have rested, spots where manure or animal waste was previously piled, places where straw or weeds were burned, or mounds or depressions where water collects. Areas close to streams, forests, irrigation canals, roads, or buildings should also be avoided. Soil samples should not be taken from under isolated trees in fields unless the land is specifically designated for fruit or poplar tree cultivation.
How to take soil samples:
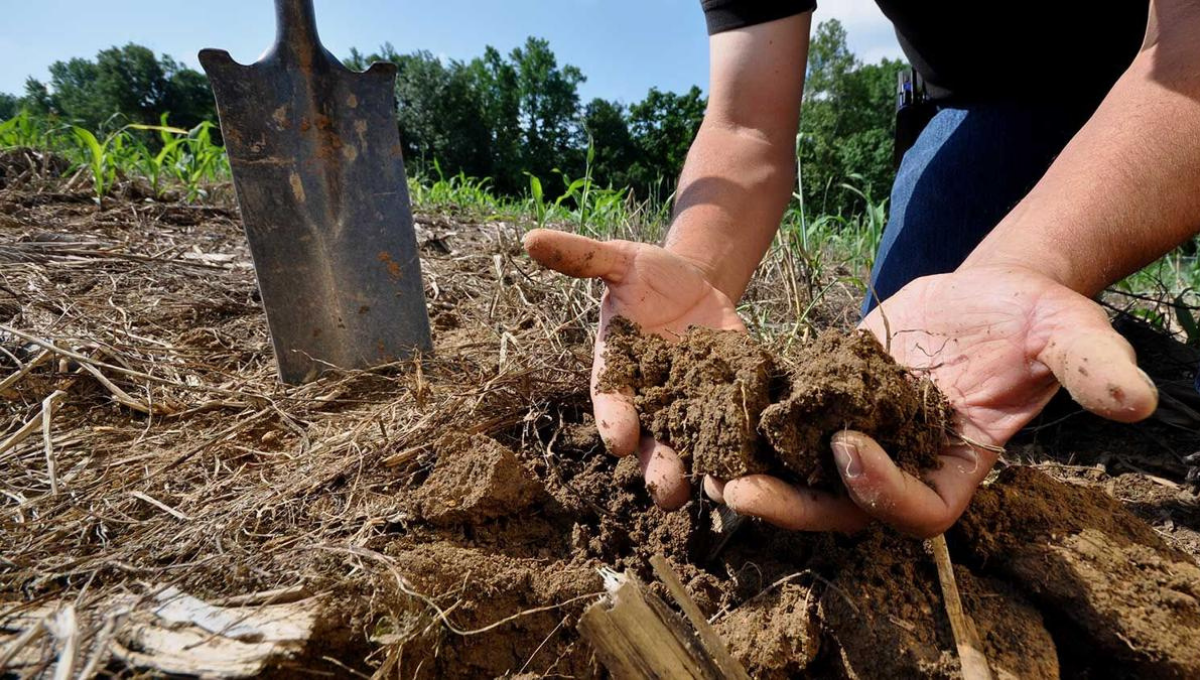
For annual crops, to take soil samples for fertilization purposes, you will need a shovel, a container (bucket, basin, or large nylon) to mix the samples, and a clean nylon or cloth bag. Before using these tools, make sure the shovel is thoroughly cleaned and free of any residue. The nylon or cloth bag used to send the soil samples to the laboratory should be large enough to hold about 1 kg of soil.
Sampling method:
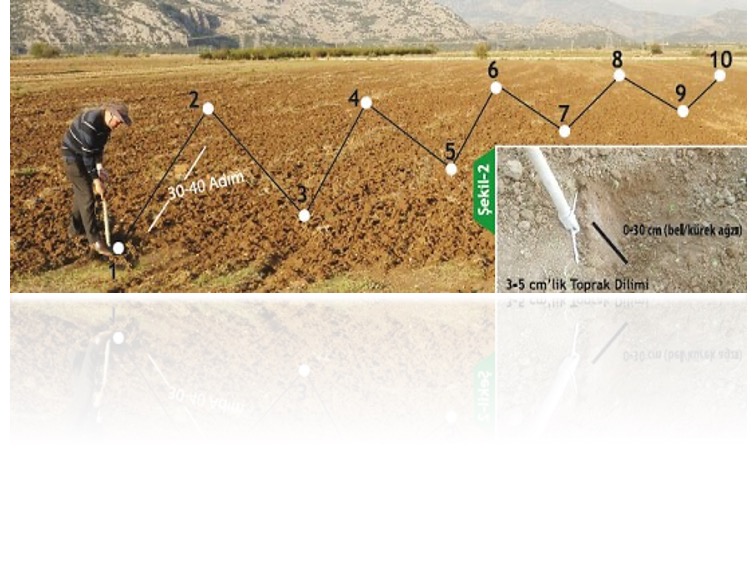
Soil samples are taken by walking in a zig-zag pattern from one end of the field to the other. The aim is to ensure samples are collected from all parts of the field. All the soil samples collected in the bucket are thoroughly mixed, and about 1 kg of soil is placed into the nylon or cloth bag.
Labeling:
Labeling the prepared and bagged soil sample is important to identify who the sample belongs to and from which part of the field it was taken. On a piece of paper, written in pencil, include the name and surname, the location of the sample (field name or different parts of the same field), the crop to be planted in the upcoming season, and the crop grown in the previous year. This paper is then placed inside the bag.
How to take samples from each point in the field:
When reaching the point to take a soil sample:
- Check if it is a suitable location.
- If suitable, clean any grass or straw from the surface.
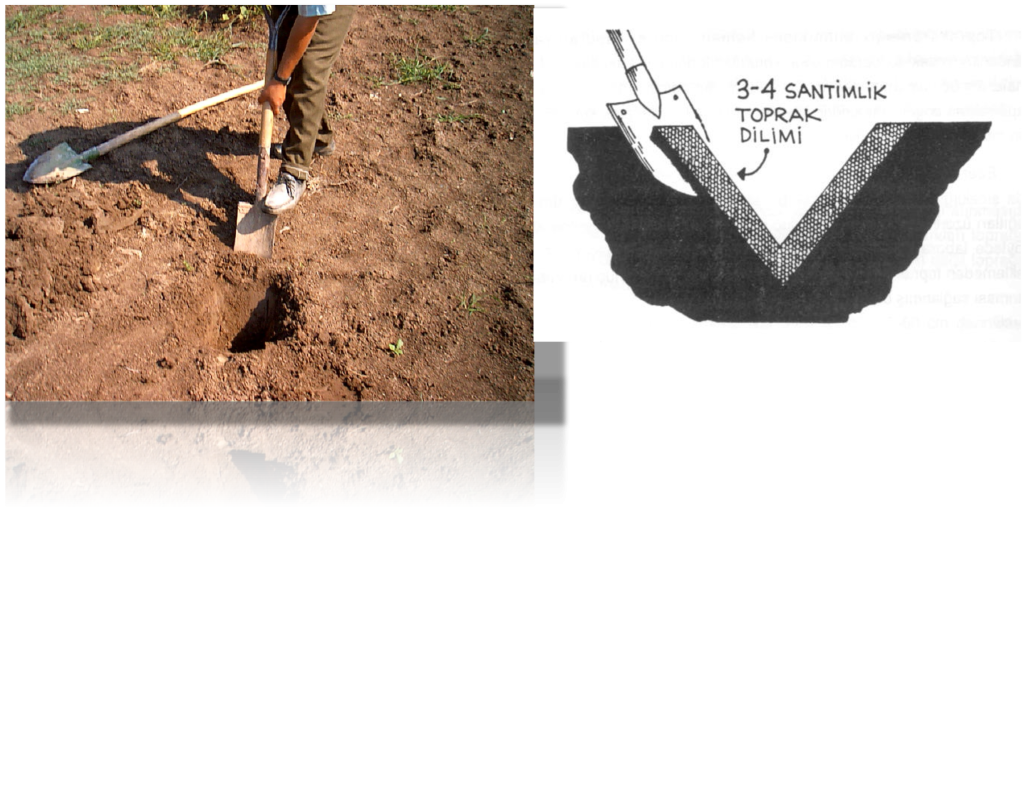
- Insert the shovel to a depth of 20 cm (plow depth) and place the removed soil next to the hole.
- If any soil has fallen into the hole, clean it out.
- Insert the shovel again to a depth of 18-20 cm, taking a slice of soil about 3-5 cm thick.
- Place the sample into the bucket without disturbing the sides of the slice. Continue this process for 10-20 samples across 40 decares of land.
Packaging the samples:
If the soil samples are placed in plastic bags, the bags should be punctured in several places to allow moisture to escape. This also prevents the paper label inside from disintegrating due to moisture. If the samples will not be sent to the laboratory immediately, they should be spread out in a clean, dry location at room temperature on an unused plastic sheet or sack to dry.
Common mistakes in soil sampling practices:
- Not taking samples from a depth of 20 cm but only from the surface, often by hand.
- Collecting insufficient quantities of soil (100-150 grams instead of 1 kg), resulting in inadequate samples for laboratory analysis.
- Placing samples in inappropriate containers.
- Labels written with ink pens instead of pencils, leading to smudged and unreadable labels due to condensation inside plastic bags.
- Not puncturing plastic bags, leading to moisture from the soil destroying the paper labels inside.
- When a farmer has multiple fields in the same area, failing to label which sample belongs to which field leads to confusion when the laboratory reports are returned.
For perennial crops:
Soil sampling for fertilization purposes in perennial crops follows the same principles as for annual crops. However, samples should be taken not only from the 20 cm plow depth but also deeper in the soil. Typically, samples are taken from 0-20, 20-40, and 40-60 cm depths, and if necessary, from 60-90 or 90-120 cm depths. A shovel may not be sufficient for deeper samples, so augers or other tools can be used, or a trench (soil profile pit) can be dug, and samples taken from a clean edge of the trench.
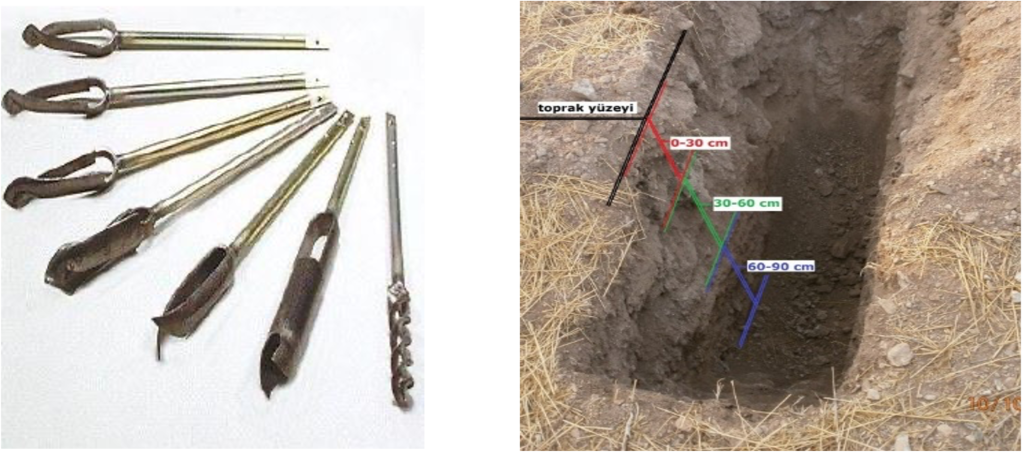
For perennial crops, soil samples should not be taken randomly but from the tree canopy dripline. The collected samples are labeled, bagged, and sent to the laboratory in the same way as described for annual crops.